
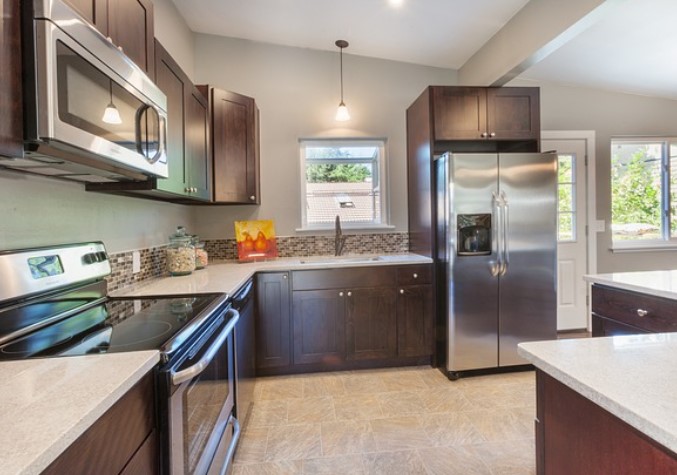
Peel-and-stick tiles are revolutionizing the world of home improvement. These self-adhesive tiles offer a convenient, cost-effective, and stylish way to transform your kitchen space without the hassle of traditional tiling. Whether you want to update your backsplash, countertop, or floor, peel-and-stick tiles for the kitchen provide an easy solution to enhance the aesthetic of your space. In this guide, we will dive deep into what peel-and-stick tiles are, their benefits, the installation process, design ideas, and more.
What Are Peel and Stick Tiles?
Peel-and-stick tiles are self-adhesive tiles that don’t require grout, mortar, or special tools to install. Made of vinyl, PVC, or other durable materials, they have a sticky backing that adheres to most surfaces. Peel off the protective film, press the tile onto your surface, and you have a clean, beautiful look in no time—they’re for DIYers and those who want to save time and money.
Benefits of Using Peel and Stick Tiles in Your Kitchen
Peel-and-stick tiles offer numerous advantages, making them popular for kitchen renovations. Here are some of the key benefits:
1. Ease of Installation
Peel-and-stick tiles are effortless to install, making them ideal for beginners and homeowners looking for a quick, hassle-free renovation. Unlike traditional tile installation, which requires mixing grout and using specialized tools, peel-and-stick tiles only require basic measurements, cutting, and sticking.
2. Cost-Effective
Traditional tile installation can be expensive due to the cost of materials and labor. Peel-and-stick tiles, on the other hand, are budget-friendly and allow you to complete the installation yourself, saving time and money.
3. Wide Variety of Designs
Peel-and-stick tiles come in various designs, colors, and finishes. Whether you prefer a classic subway tile, an elegant marble pattern, or a trendy mosaic design, you can find the perfect tile to suit your kitchen’s style. You can mimic the look of more expensive tiles, giving you the high-end appearance without the hefty price tag.
4. Durability and Water-Resistance
Most peel-and-stick tiles are water-resistant, perfect for high-moisture areas like the kitchen. They resist stains, scratches, and fading, ensuring your kitchen maintains its beauty for years.
5. Temporary or Permanent Solution
Peel-and-stick tiles can be removed easily without damaging the underlying surface, making them an excellent option for renters or those who frequently change their kitchen. If you want a permanent upgrade, some peel-and-stick tiles can be replaced with an extra adhesive layer for long-lasting results.
6. Low Maintenance
These tiles are very low maintenance. They don’t need sealing; cleaning is a breeze—wipe them down with a damp cloth. This makes peel-and-stick tiles an excellent option for busy homeowners who don’t want to spend too much time maintaining their kitchen.
How to Install Peel and Stick Tiles in Your Kitchen
Installing peel-and-stick tiles is a straightforward process for beginners. Here’s Ha’s step-by-step guide to help you get started:
Step 1: Prepare the Surface
Before installing your peel-and-stick tiles, ensure that the surface you’re using them on is clean, smooth, and dry. Remove any old adhesive, grease, or grime from the surface, which can affect the tile’s surface. Wipe the area with a mild tileser and let it dry completely for best results.
Step 2: Measure and Plan Your Layout
Use a tape measure to measure the area you want to cover with tiles. Ensure you’re up to date with accurate measurements and a clean, symmetrical layout. For best results, start in the center of your area or the area you’re working on and work out. This will help you avoid uneven edges.
Step 3: Cut the Tiles (If Necessary)
If the tiles need to be cut to fit around edges, corners, or outlets, use a utility knife or scissors to trim them to the required size. Most peel-and-stick tiles are easy to cut, but measure carefully before cutting.
Step 4: Peel Off the Backing
Once your tiles are measured and ready, peel off the backing from the adhesive side of the tile. Be careful not to touch the adhesive with your fingers to ensure it sticks well to the surface.
Step 5: Stick the Tile
Press the tile onto the surface, starting at the center and working your way out. Apply firm pressure to ensure it sticks evenly. If it’s a backsplash or wall, use a level to ensure the tiles are straight.
Step 6: Repeat the Process
Continue applying tiles, ensuring each one lines up with the previous one. Use spacers if necessary to maintain even gaps between tiles. After all tiles are installed, use a grout pen or caulk to fill any gaps or seams between the tiles, if desired.
Step 7: Clean and Enjoy
Once your tiles are installed, wipe away any excess adhesive and clean the tiles with a damp cloth. Your kitchen is now ready for a fresh, stylish look!
Design Ideas for Using Peel and Stick Tiles in the Kitchen
Peel-and-stick tiles offer endless design possibilities for your kitchen. Here are some creative ideas to inspire your next project:
1. Classic Subway Tile Backsplash
Subway tiles are a timeless choice for kitchen backsplashes. Their simple, clean design complements a wide range of kitchen styles, from modern to traditional. You can opt for white or add a pop of color to make a statement.
2. Mosaic Tile Accents
Add a touch of elegance to your kitchen by using peel-and-stick mosaic tiles as a backsplash or accent wall. Mosaics come in various patterns, from intricate designs to simple geometric shapes, allowing you to create a personalized look.
3. Marble Effect
Marble is a luxurious material, but it can be pricey. With peel-and-stick tiles, you can achieve the sophisticated look of marble at a fraction of the cost. Use marble-effect tiles for a sleek, modern kitchen style.
4. Patterned Tiles for Bold Statements
If you want to make a bold statement, consider using patterned peel-and-stick tiles. From geometric shapes to floral designs, these tiles can add personality and flair to your kitchen. Use the m as a backsplash or on the floor for an eye-catching look.
5. Shimmering Metallic Tiles
Metallic peel-and-stick tiles are an excellent option for a touch of glamour. These tiles reflect light and add a chic, modern feel to your kitchen. Choose gold, silver, or copper to match your kitchen’s scheme.
Peel and Stick KitchenKitchen’schen: FAQs
How long do peel-and-stick tiles last in the kitchen?
Peel-and-stick tiles can last several years, depending on the quality of the tiles, the installation, and the level of wear and tear. When installed correctly, high-quality tiles can last up to five years or more.
Can I use peel-and-stick tiles on kitchen floors?
Yes, many peel-and-stick tiles are designed specifically for kitchen floors. To ensure durability, look for tiles labeled suitable for high-traffic areas. Be sure to follow the manufacturer’s instructions. Are the tiles easy to remove?
Yes, peel-and-stick tiles are designed to be easily removed without damaging the surface underneath. This makes them an excellent option for renters or those who want to update their kitchen frequently.
Can I use peel-and-stick tiles for a more traditional look?
While most peel-and-stick tiles don’t require grout, you can grout for a more traditional, seamless tile look. Be sure to use non-sanded grout to avoid damaging the tiles’ surfaces.
Are peel-and-stick tiles waterproof?
Most peel-and-stick tiles are water-resistant, making them an excellent choice for high-moisture areas like the kitchen. However, it is essential to check the product specifications to ensure they are suitable for wet areas.
Conclusion
Peel-and-stick tiles are an innovative and easy way to update your kitchen, offering style, convenience, and affordability. With their ease of installation, variety of designs, and low maintenance, they are perfect for anyone looking to give their kitchen a fresh, modern look without the expense or hassle of traditional tiling. Whether you’re updating your backsplash, floor, or countertops, peel-and-stick tiles provide an accessible and stylish solution.